


Microfusie van 3D-geprinte onderdelen met uitgebrande harsen
Microfusion of verloren was gieten is een van de meest meest gebruikte productiemethoden in de sieradenindustrie en is het oudst bekende gietproces.
Door gieten kunnen metalen replica's worden verkregen door middel van een mal die is gemaakt van een prototype dat traditioneel in was is gemodelleerd. In dit geval worden 3D-geprinte onderdelen met uitgebrande harsen gebruikt om de wasmodellen te vervangen.
Sieraden kunnen van verschillende metalen worden gemaakt, waaronder goud, platina, zilver en messing , met behulp van het gietproces. Hieronder ziet u het microfusieproces voor sieraden van 3D-geprinte stukken met uitgebrande harsen:
1- 3D printen van het onderdeel
Gebaseerd op ontwerpen gemaakt met behulp van CAD-software, de gewenste modellen moeten 3D geprint worden. Er is momenteel een groot aantal calcineerbare harsen verkrijgbaar van verschillende fabrikanten. Het gebruik van het ene of het andere materiaal hangt af van de gebruikte 3D-printer en de vereiste eigenschappen van de onderdelen.
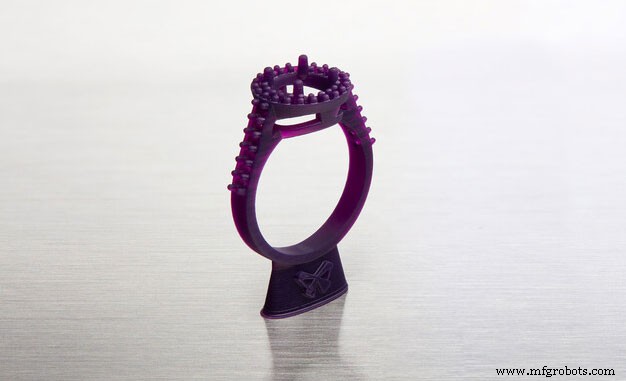
Afbeelding 1:3D-geprinte ring met FormLabs burn-out hars. Bron:FormLabs.
Een van de meest populaire 3D-printers voor 3D-printen in de juwelensector is de Form3 van de gerenommeerde fabrikant FormLabs. Deze 3D-printer vereist geen geavanceerde technische kennis en kan daarom probleemloos worden gebruikt . De Form3 3D-printer beperkt het gebruik ervan door alleen ondersteunend materiaal te gebruiken dat is ontwikkeld door de fabrikant. Dit kan een voordeel zijn, aangezien er geen set-up nodig is en de configuratieparameters en aanpasbare waarden tot een minimum worden beperkt, waarbij alleen het materiaaltype en enkele basisparameters moeten worden geselecteerd. Hierdoor wordt de foutmarge tot een minimum beperkt.
De volgende tabel toont enkele van de meest populaire brandbare harsen en hun compatibiliteit met 3D-printers:
| Hars | Fabrikant | Technologie | Compatibiliteit |
|---|---|---|---|
| Gietbare was | FormLabs | SLA | Formulier 2, formulier 3, formulier 3L, formulier3+ |
| Gietbare was 40 | FormLabs | SLA | Form 2, Form 3, Form 3L, Form3+ |
| zWax Amber | UniZ | LCD | Slash, Slash 2, Slash 2 Plus, Slash 2 Pro |
| zWax Purple | UniZ | LCD | Slash, Slash 2, Slash 2 Plus, Slash 2 Pro |
| Bluecast original | Zortrax | LCD | UniZ, WANHAO, zortrax, ANYCUBIC, ASIGA, B9 Creator, FLASH FORGE Moon Ray, Prusa. |
| Bluecast X5 | Zortrax | LCD | UniZ, WANHAO, zortrax, ANYCUBIC, ASIGA, B9 Creator, FLASH FORGE Moon Ray, Prusa. |
| Bluecast X10 | Zortrax | LCD | UniZ, WANHAO, zortrax, ANYCUBIC, ASIGA, B9 Creator, FLASH FORGE Moon Ray, Prusa. |
| Dental Cast | Harz Labs | LCD | Formlabs, PEOPOLY, UniZ, WANHAO, zortrax, ANYCUBIC, ASIGA, B9 Creator, FLASH FORGE Moon Ray, Prusa. |
Table 1:Burn-out resins and compatibility. Source:Filament2print.
Each material has different properties and requires different parameters. However, they all have a common characteristic:they have been developed to replace wax parts in the microfusion process, with a composition that achieves castings free of residues that could affect the final result of the parts.
Once the parts have been printed, they must be cured if the material requires it. This depends on the composition of the resin and the manufacturer's advice should always be followed to achieve an optimum result.
2- Wax tree
Once the parts are cured (in cases where this step is required), the removal of the backing can be carried out, always with great care. Sandpaper (400 grit or higher) or even a rotary tool with a polishing attachment can be used to achieve total removal of the support and a perfect finish.
To create the wax tree, a wax base is taken and attached to a rubber cover of the sprue. Small cylindrical wax rods are welded to the wax base using a heat tool. The 3D printed parts are welded to the other end of the bars.
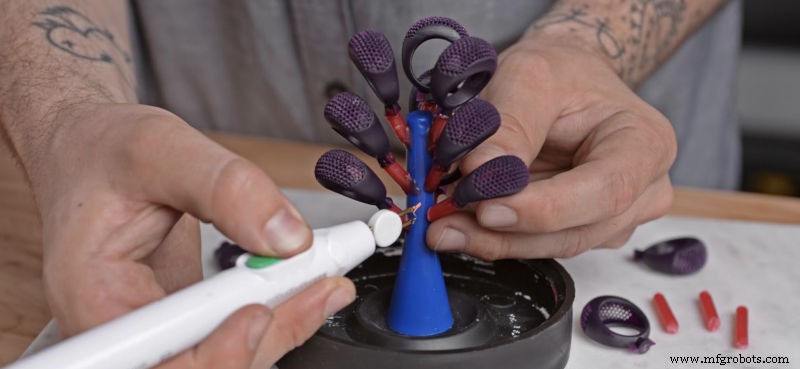
Image 2:Casting wax tree. Source:FormLabs.
This process is similar to that carried out in microfusion when casting traditionally carved wax pieces.
3- Mould preparation
The wax tree with the 3D printed parts in burn-out resin is to be placed inside a refractory steel cylinder, which is to be fitted into the rubber cylinder cover. In case the refractory steel cylinder has holes, these should be covered by wrapping the cylinder in adhesive tape.
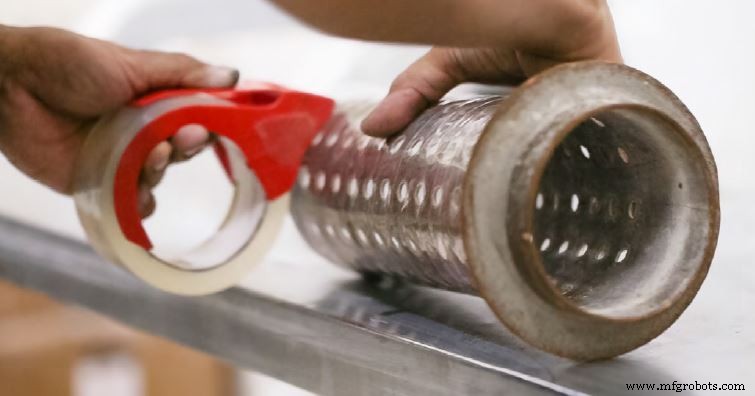
Image 3:Refractory steel cylinder shell. Source:Formlabs.
The casting must then be poured slowly, always from the side of the cylinder to avoid damaging the tree with the parts 3D printed with calcineable resin.
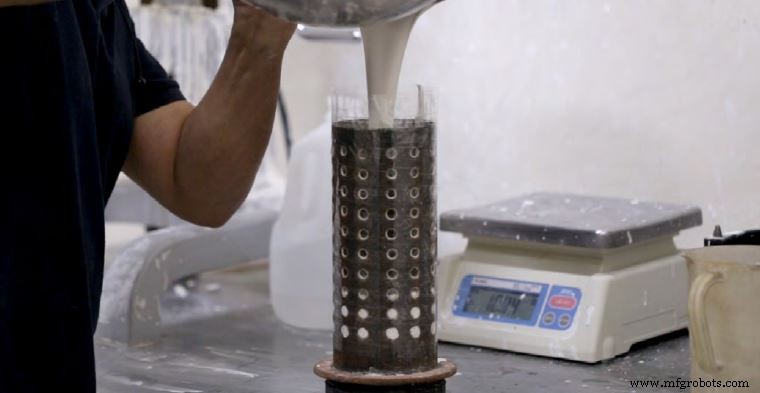
Image 4:Pouring of the casting into a refractory steel cylinder. Source:Formlabs.
When pouring the casting, it is possible that small air pockets may remain which can affect the quality of the final parts. For this reason, it is very important to carry out the degassing process in a vacuum chamber.
4- Burnout
The cylinder is placed in the oven following the time and temperature instructions recommended by the manufacturer. During this time, the wax will burn out without leaving residues, leaving the mould ready.
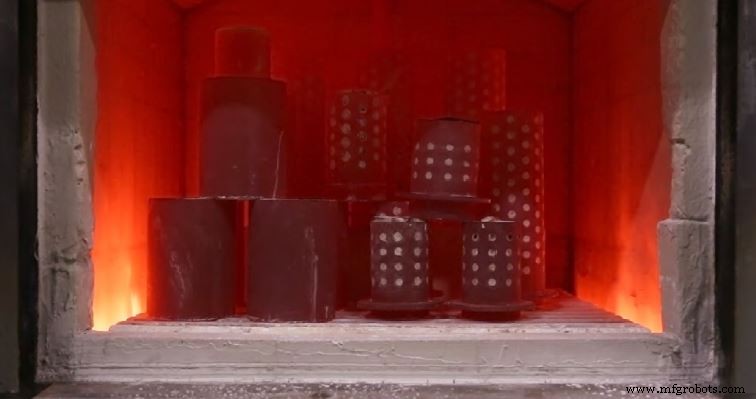
Image 5:Burnout process. Source:Formlabs.
The desired metal must then be poured into the mould to produce the final parts.
5- Washing and polishing
After casting, the mould is carefully removed from the furnace and immersed in water using tongs. During this process, the casting will melt, leaving the metal parts visible. Once washed, the metal parts are separated from the tree, polished and polished until the desired finish is achieved.
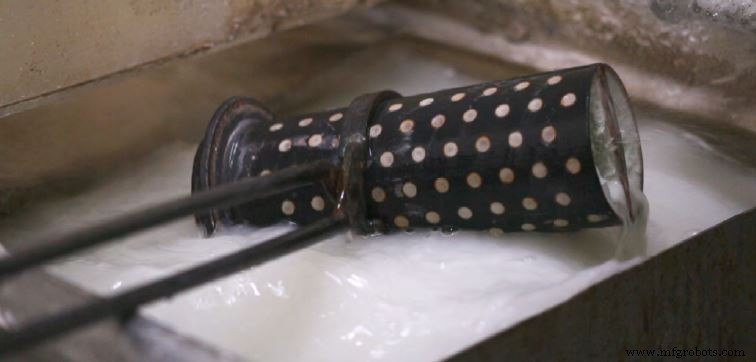
Image 6:Washing process. Source:Formlabs.
Once washed, the metal parts are separated from the tree, polished and polished to the desired finish.
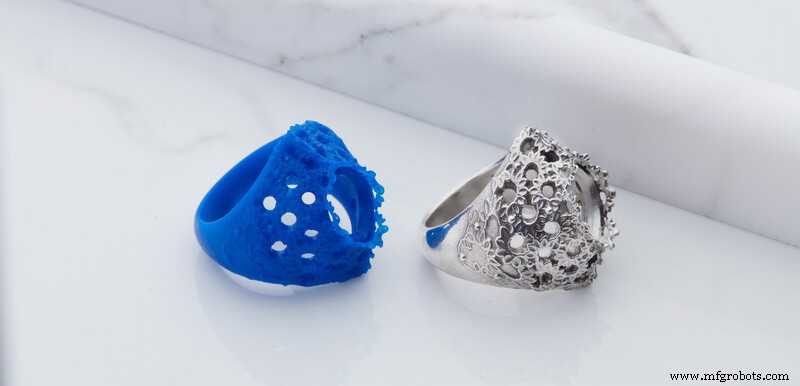
Image 7:3D printed ring with burn-out resin and silver ring after the microfusion process. Source:Formlabs.
The use of castable resins in the jewellery sector offers numerous advantages . Among others, it allows you to 3D print as many models as you want, quickly and with extreme precision . This results in a significant reduction in costs and production times.
3d printen
- 3D-geprinte kunststof onderdelen lassen en lijmen
- Moet u uw 3D-geprinte onderdelen in-house afwerken?
- 3D-geprinte onderdelen afwerken met… kleurpotloden?
- Een inleiding tot 3D-printen met selectief lasersinteren
- 3D-printen met harsen:een introductie
- Metalen onderdelen lichter maken met 3D-printen op metaal
- De zekering 1 afdrukken met de zekering 1
- Aluminium onderdelen vervangen door 3D-geprinte koolstofvezel
- Betere kwaliteitscontrole met 3D-geprinte onderdelen
- Blijf jezelf vast met functionele 3D-geprinte onderdelen!
- De Go Kart opnieuw vormgeven met 3D-geprinte onderdelen